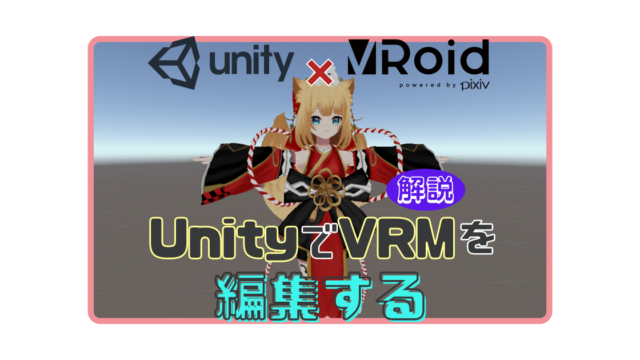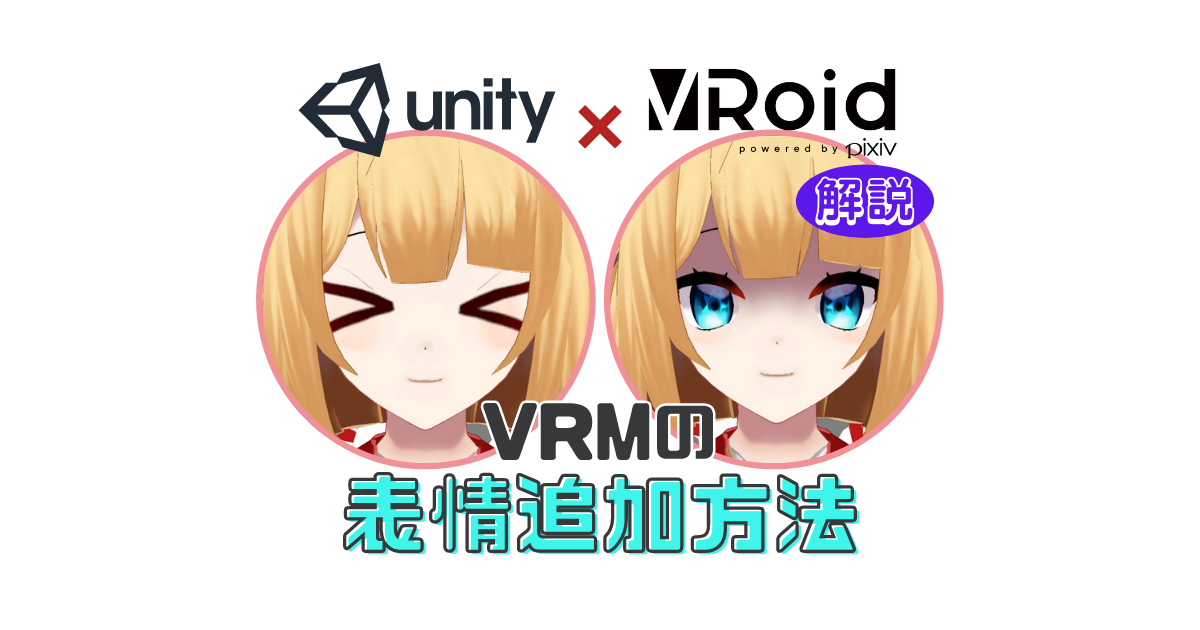
前回はUnityでVRMを読み込み、編集するところまでをやりました。
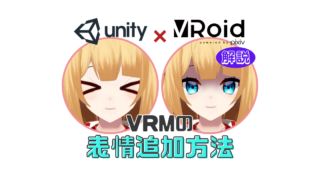
今回は、Unityで編集可能になったVRMファイルに表情を追加したり、編集したりします。
表情を追加する方法*基本*
①編集準備
1.[Assets] -> [(VRM名).BlendShapes] -> [BlandShape.asset]を選択
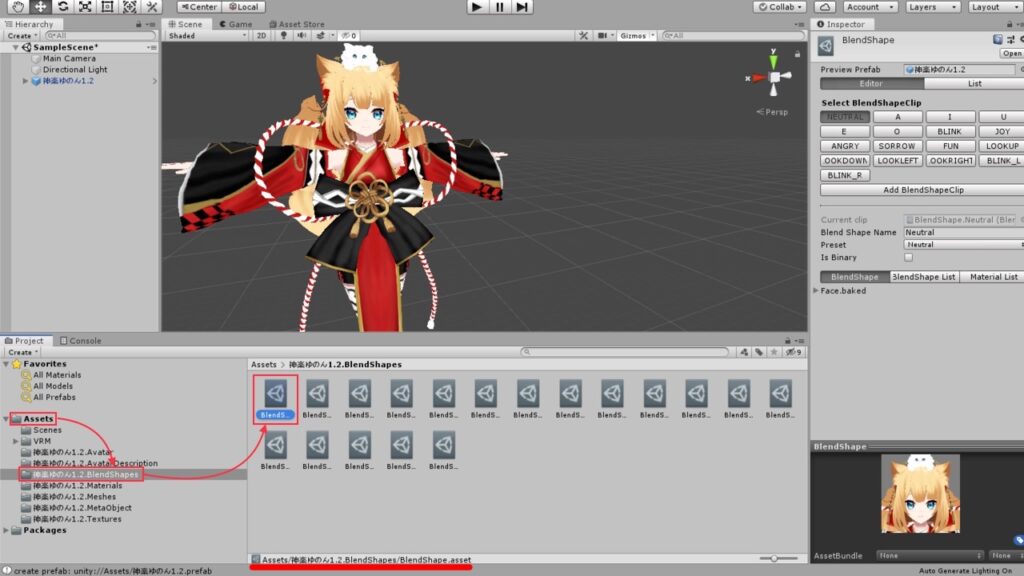
2.[Inspector]の部分に表情の項目が出てくる
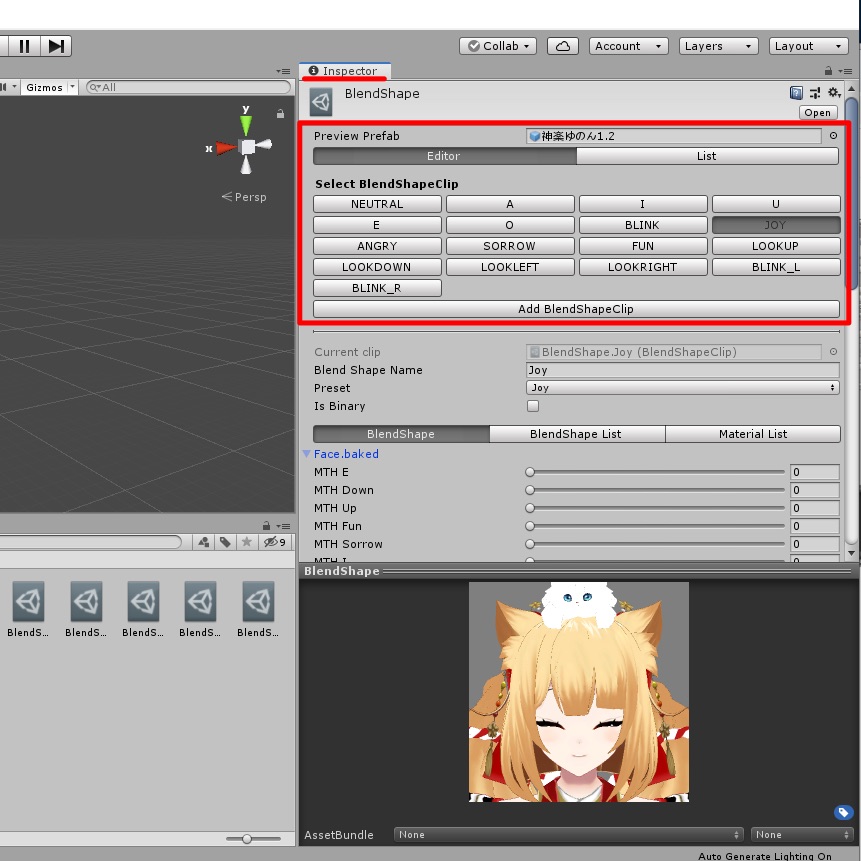
3.この画面で表情の追加や編集ができる
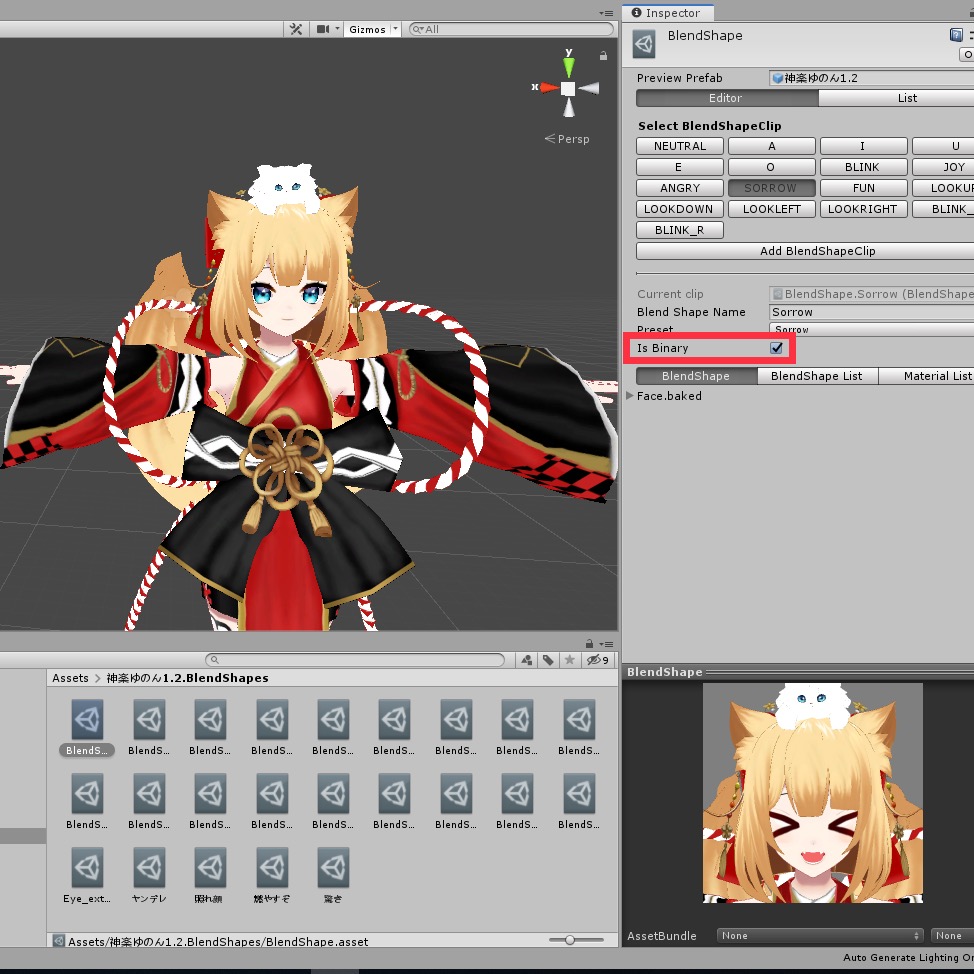
②表情の編集
1.[Inspector]の編集したい表情名をクリック
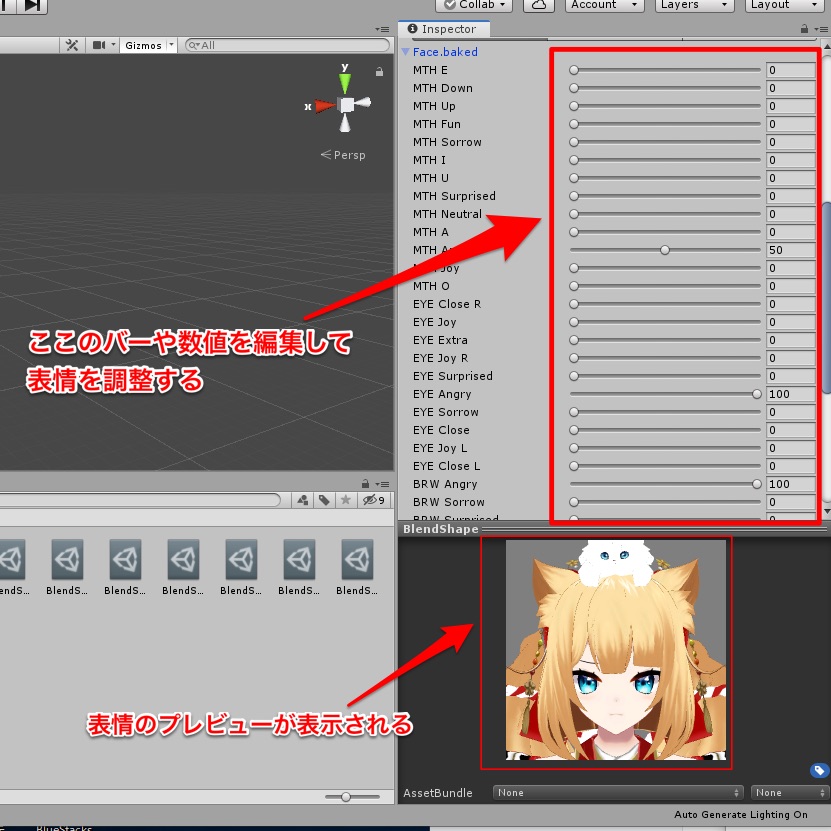
2.[Face.baked]をクリック
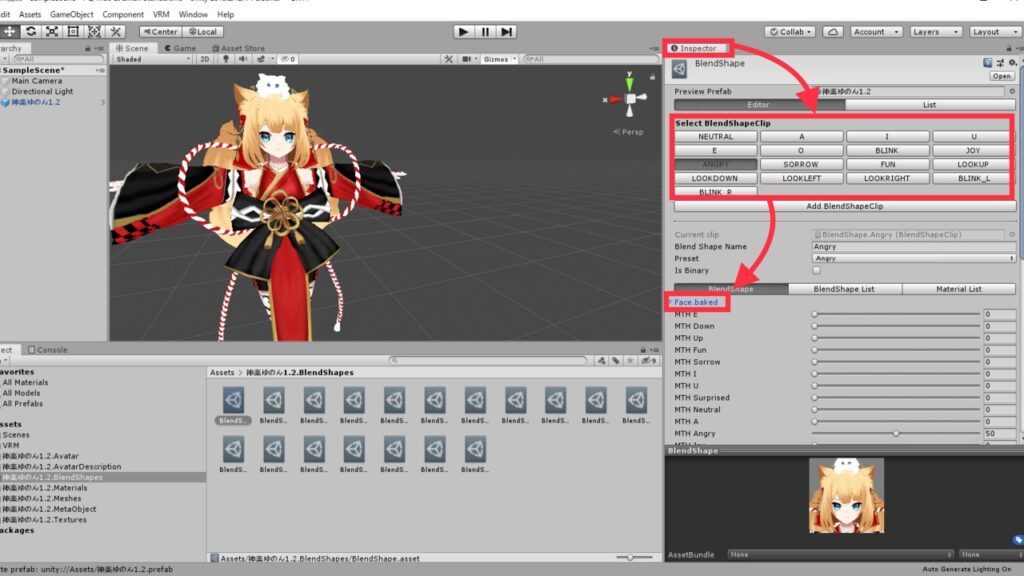
3.[Face.baked]にあるパラメーターを動かすことで表情の微調整ができる
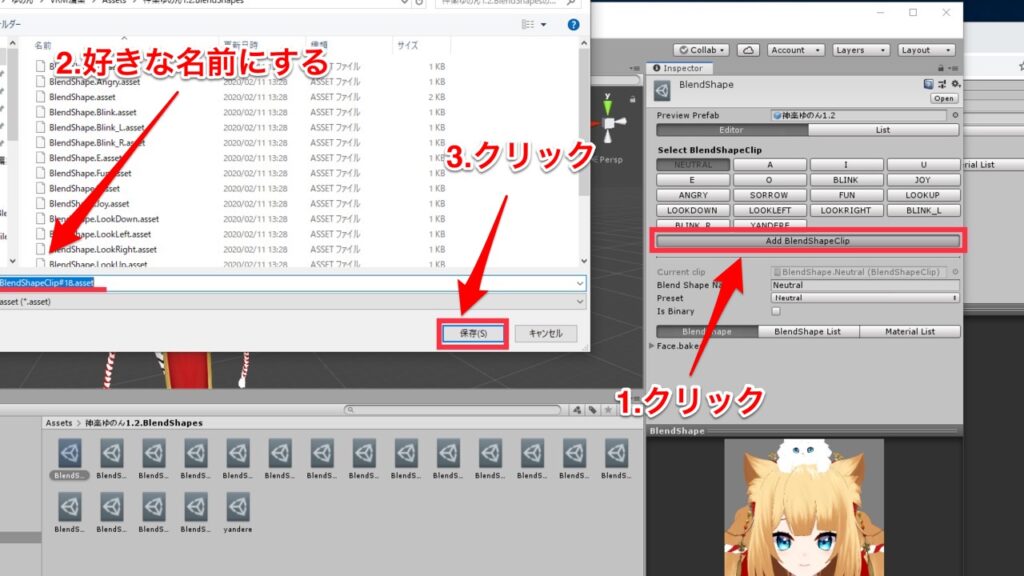
③表情の追加
1.[BlendShape.asset] -> [Select BlendShapeClip] -> [Add BlendShape Clip]
をクリック
2.好きな名前にする
3.保存
4.名称設定
・[Blend Shape Name] : 好きな表情名
・[Preset] : Unknown
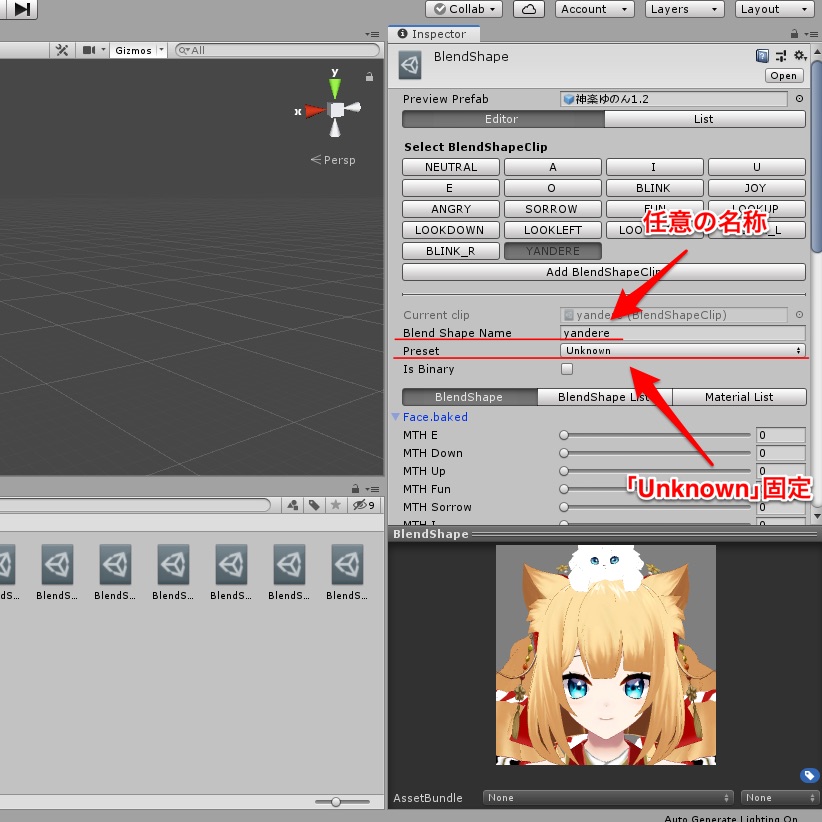
4.[Face.baked]からパラメーターを調整する
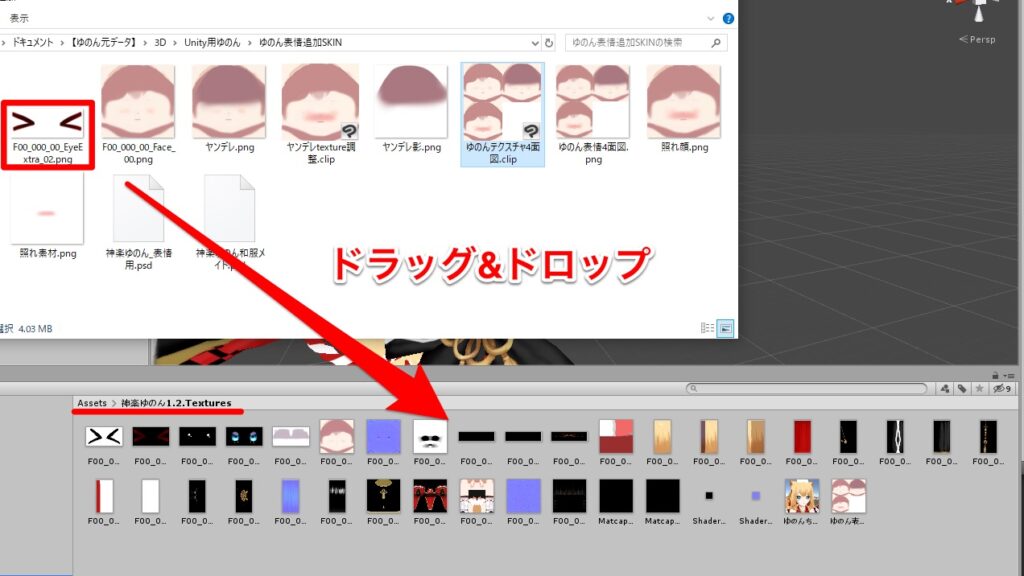
新しいTextureを既存のものと置き換えるとき
①追加したいTextureのpngファイルを用意
②[Assets] -> [(VRM名).Textures]にpngファイルをドラッグ&ドロップ
③[Assets] -> [(VRM名).Materials]でTextureを関連付ける
※今回は[><]の目を自分で用意したものと取り換えた。
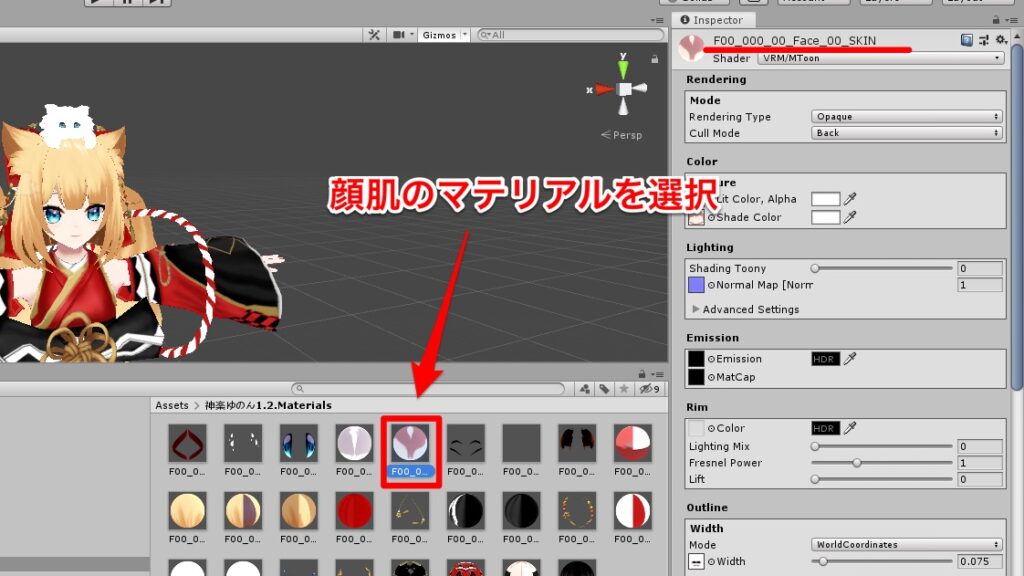
1.肌のTextureが張られているマテリアルを選択
2.[Color]->[Texture]->[Lit Color,Alpha]と[Shader Color]の横にある
小さな丸をクリック
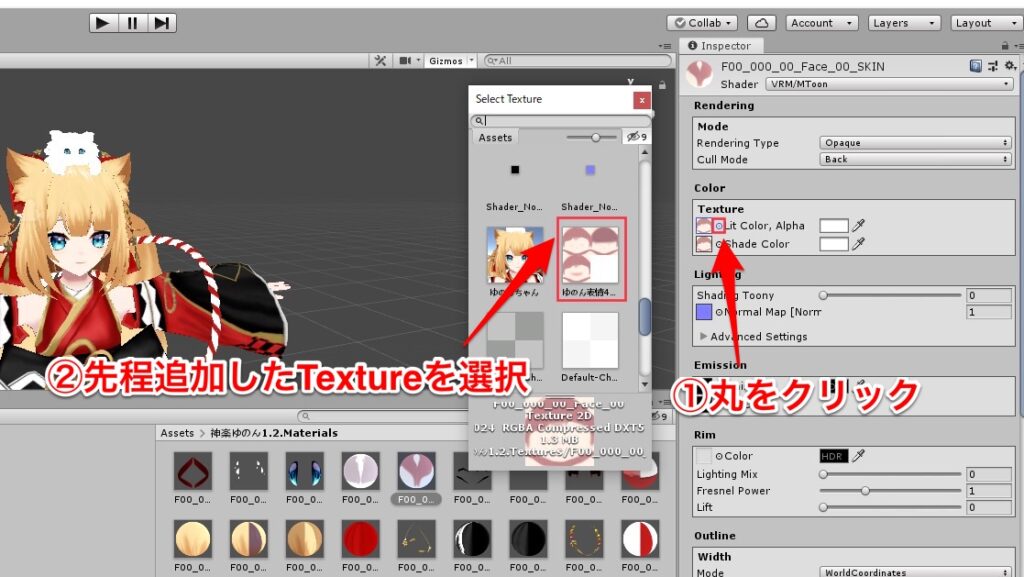
3.用意しあったpngファイルのTextureを選択
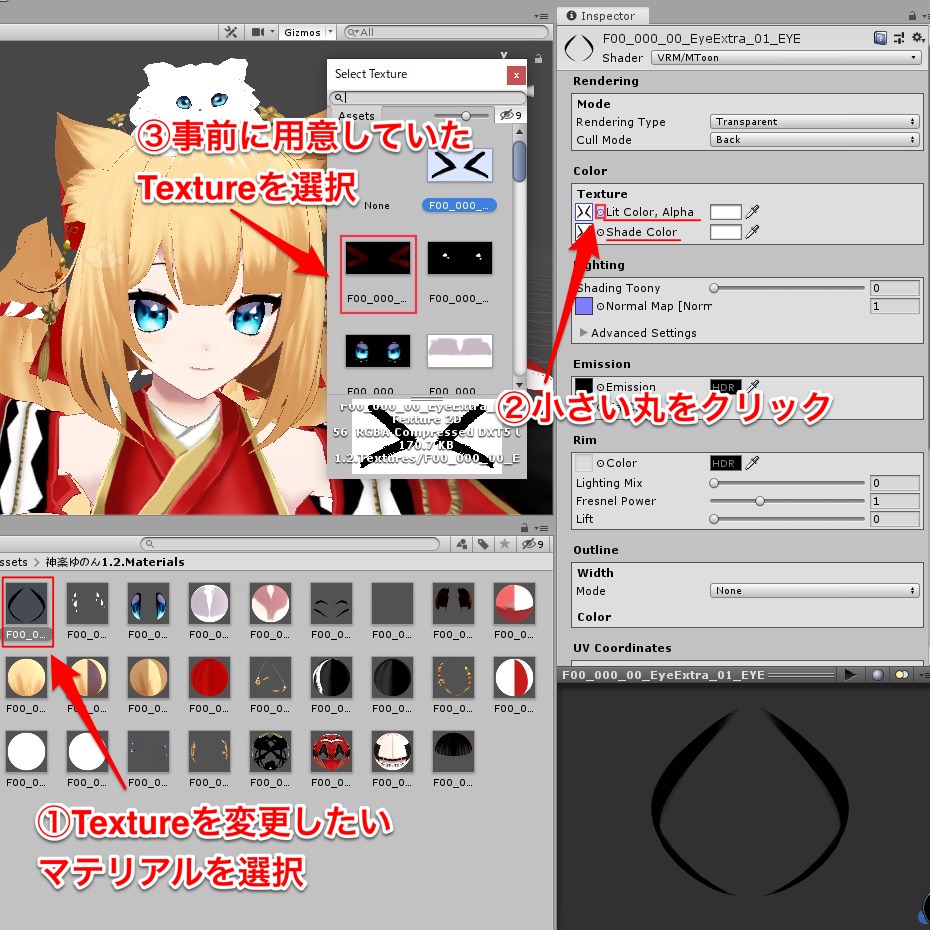
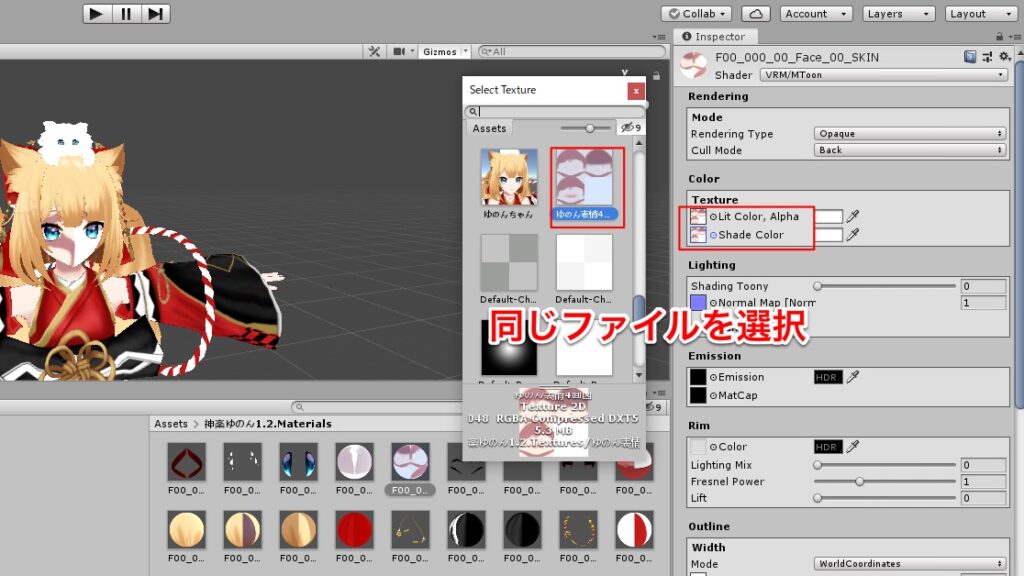
4.[Lit Color,Alpha]と[Shader Color]は両方同じファイルを選択
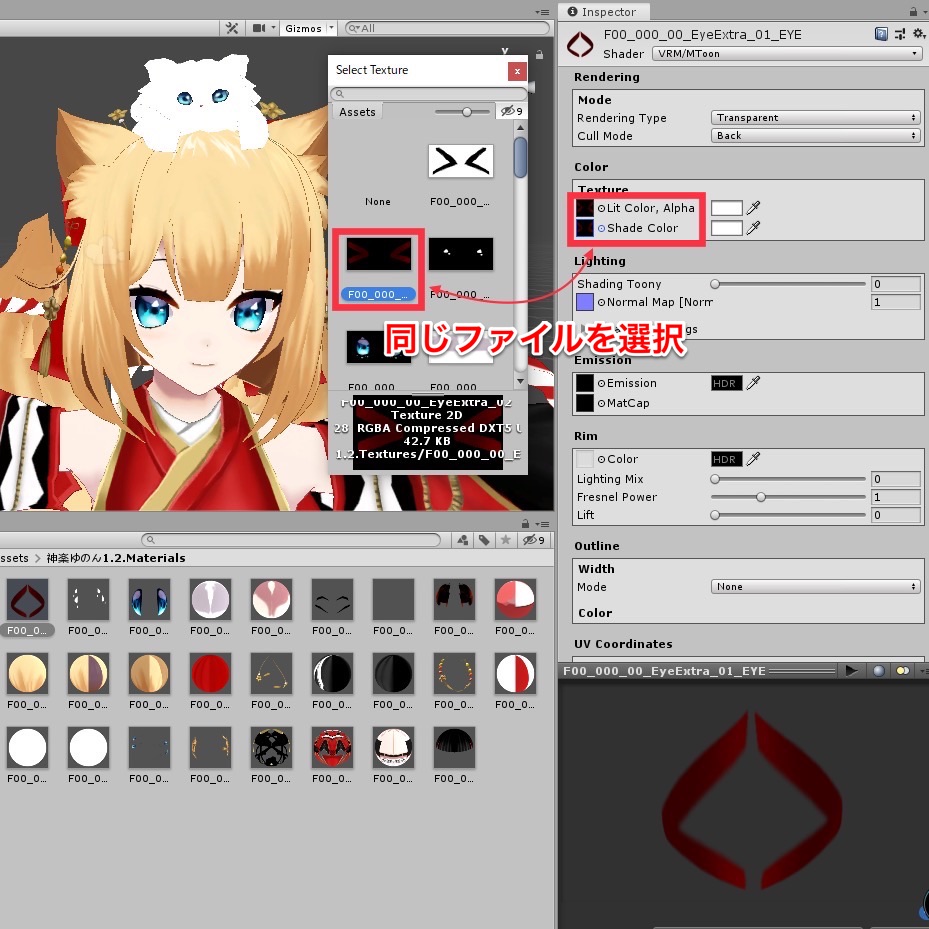
5.Textureが入れ替え完了
④[Bland Shape]で表情を調整する
—完成—
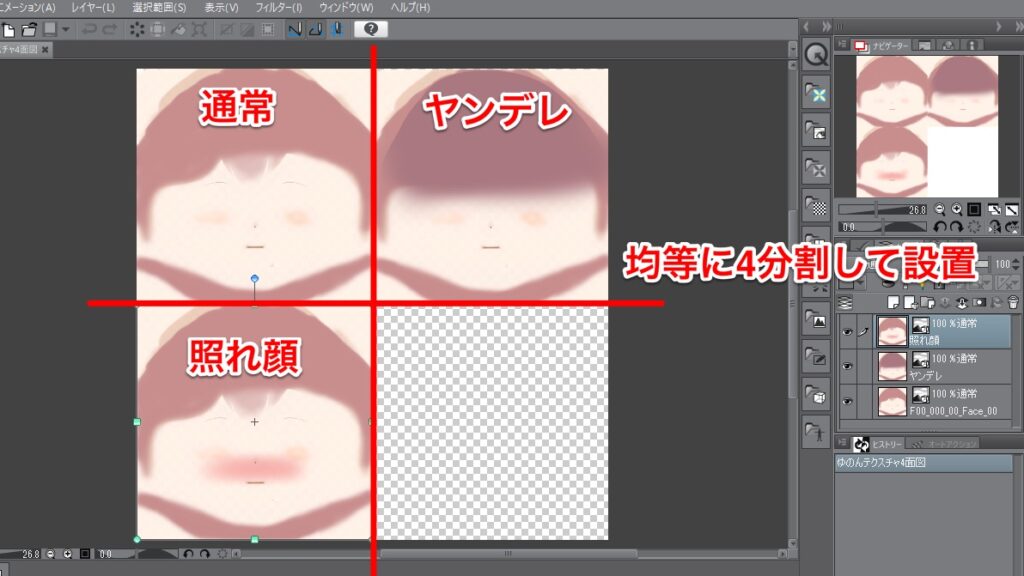
肌のTextureを増やしたいとき
①複数表情用のTextureを用意する
1.SKINを均等に並べたpngファイルを用意
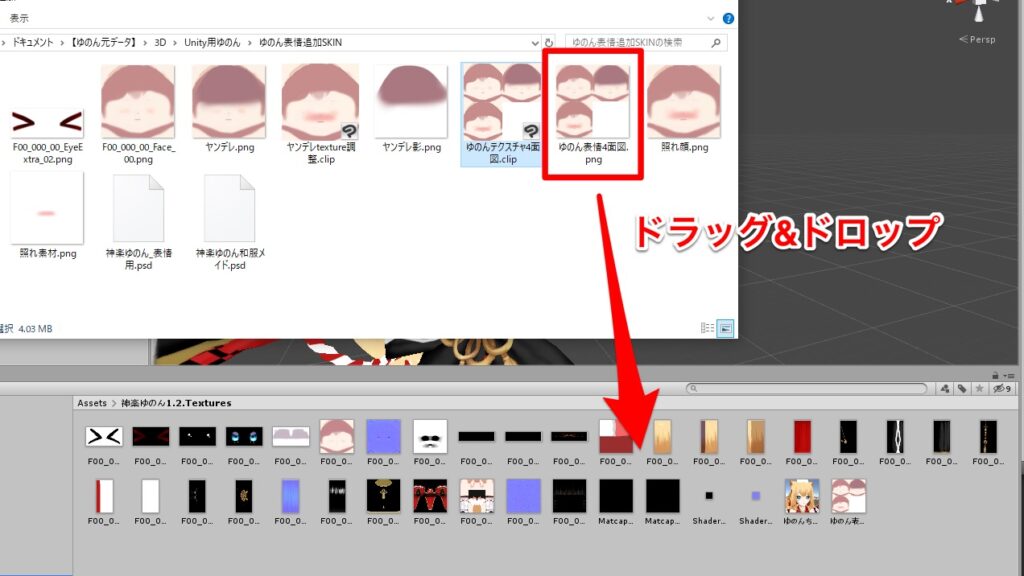
2.[Assets] -> [(VRM名).Textures]にpngファイルをドラッグ&ドロップ
②MaterialとTextureを関連付ける
1.[Assets] -> [(VRM名).Materials]を選択
2.肌のTextureが張られているマテリアルを選択
3.[Color] -> [Texture] -> 『[Lit Color,Alpha]と[Shader Color]』の横にある
小さな丸をクリックし、用意したpngのTextureを選択する。
4.[Lit Color,Alpha]と[Shader Color]は両方同じファイルを選択
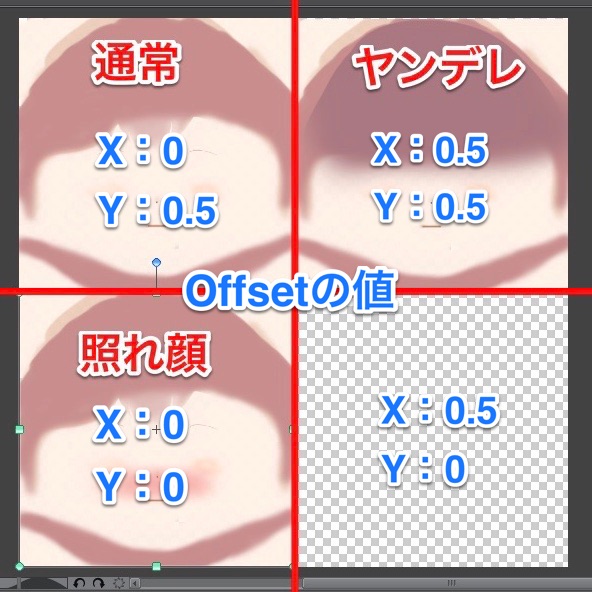
5.[UV Coordinates] -> [Sale & Offset] の値を変更
(標準の表情が出るように設定)
・Tiling:xとy方向に何枚Textureを並べるか
・Offet:Textureを並べる際の開始位置を指定
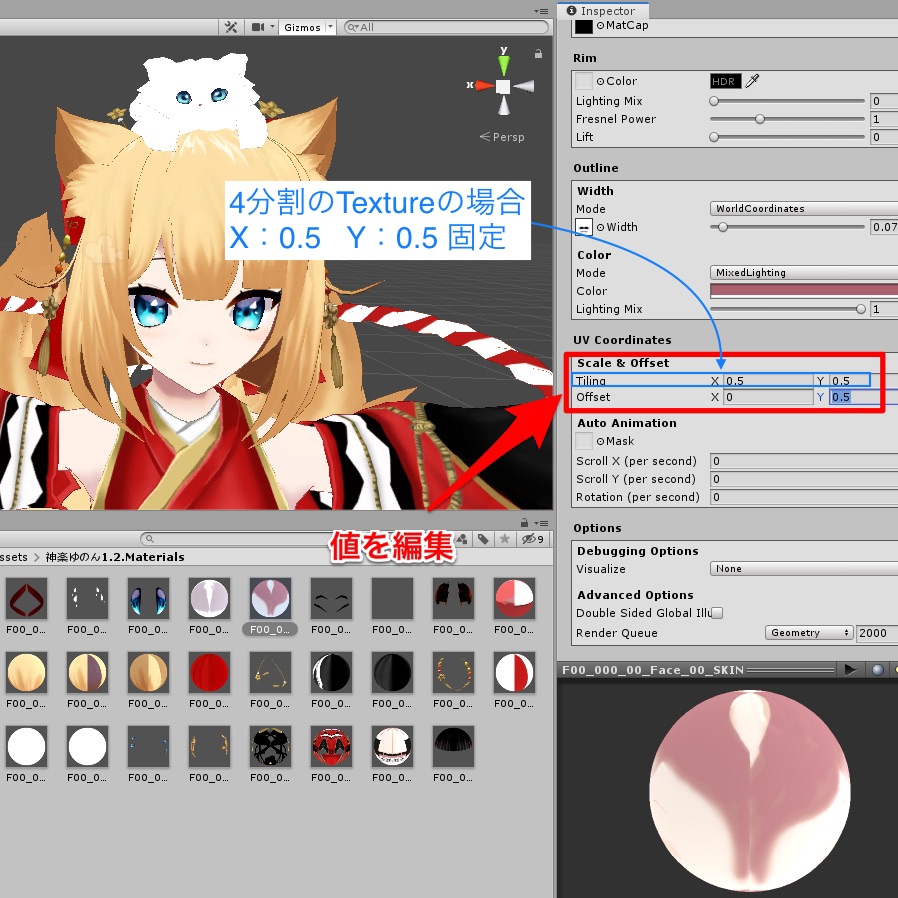
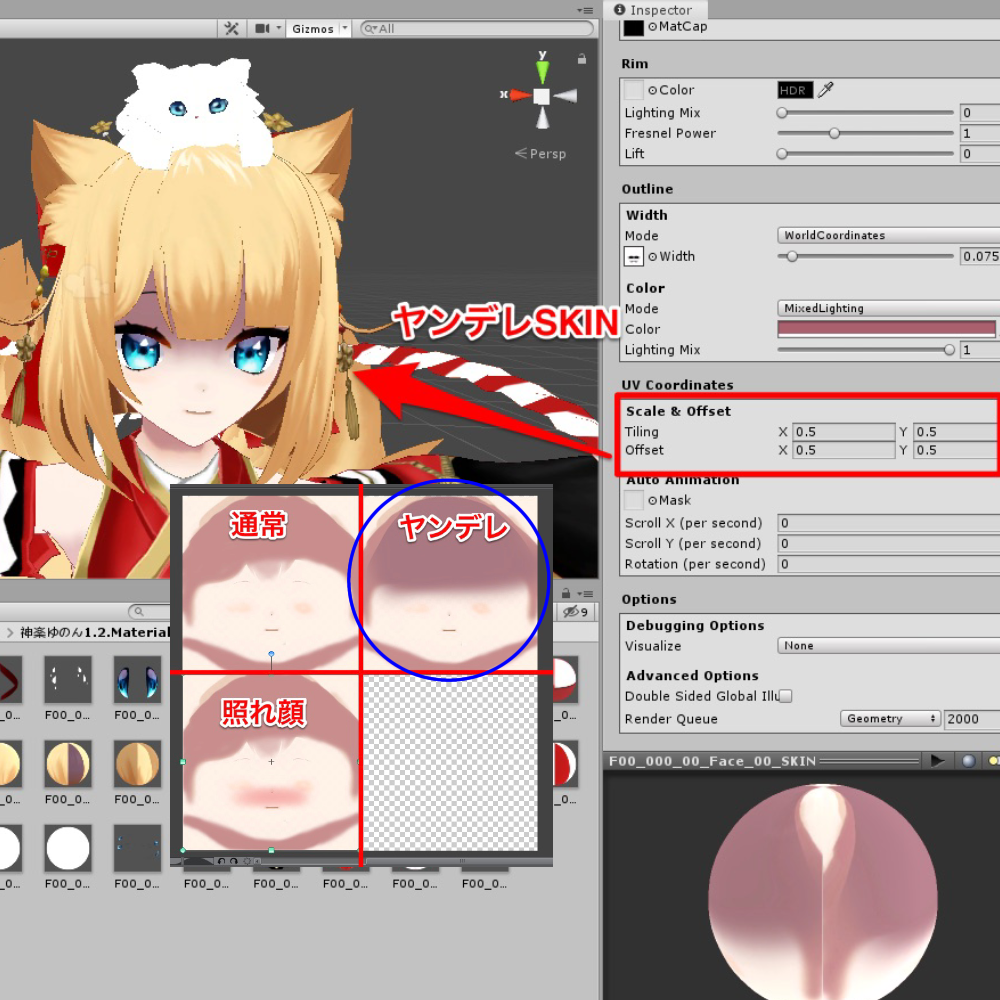
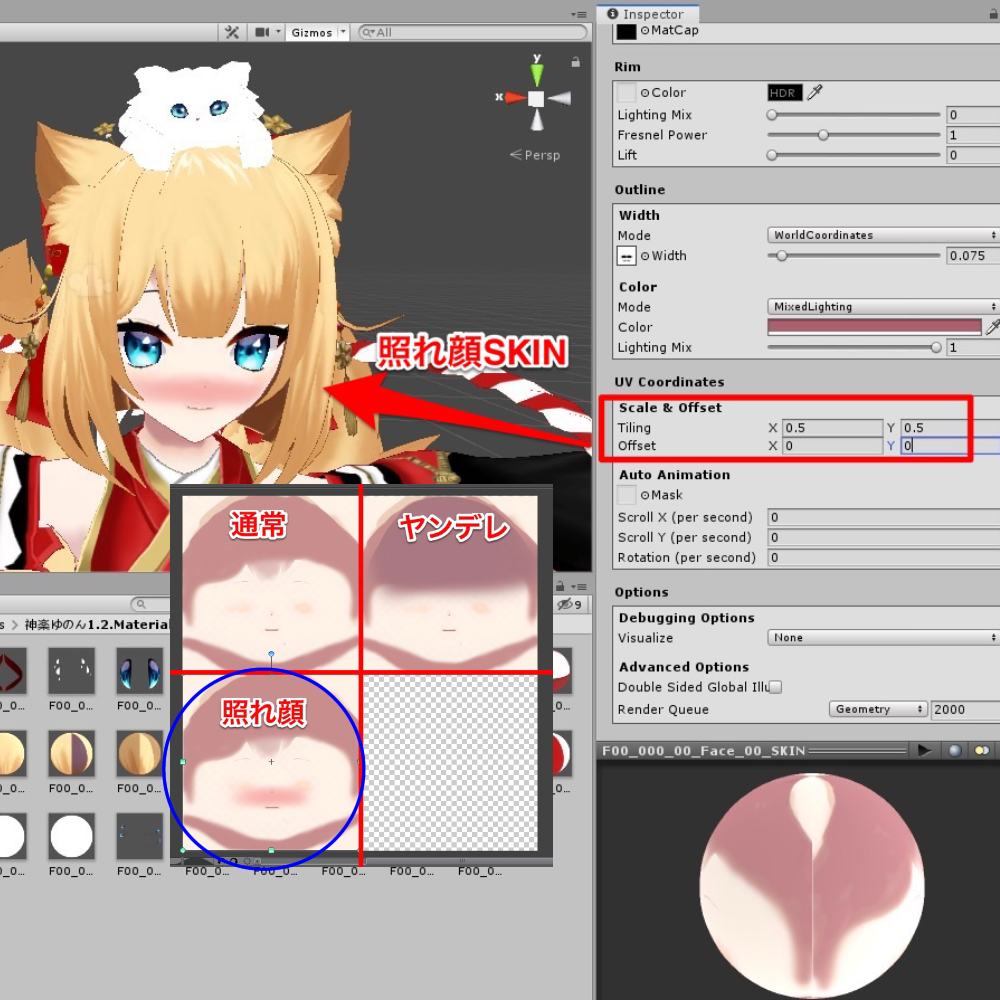
Tiling:xとy方向に何枚Textureを並べるか
➡1/4の範囲を使用するので「0.5×0.5」の設定になる
Offet:Textureを並べる際の開始位置を指定
➡️4分割の場合のOffsetの参考値👇👇
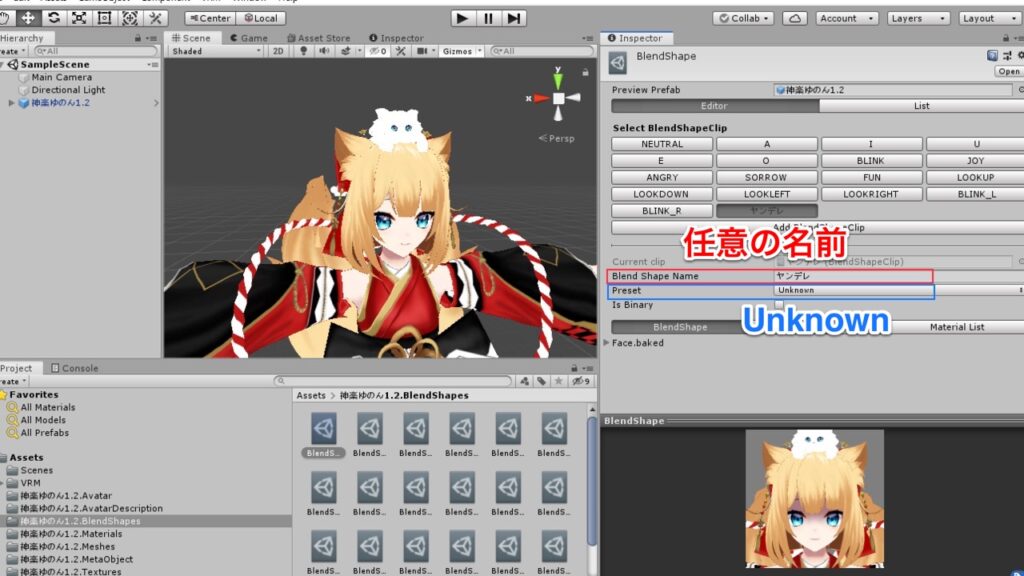
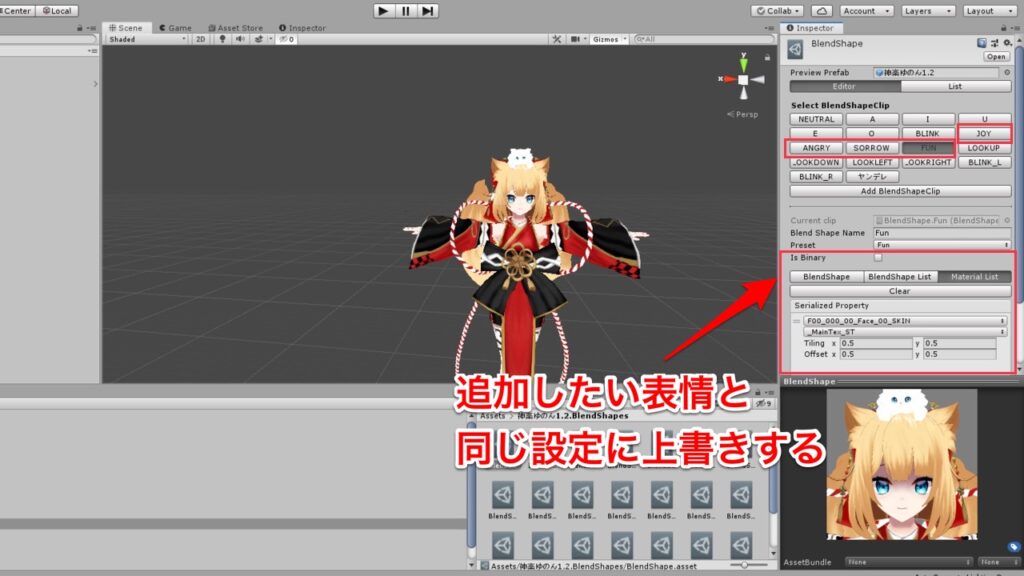
③BlendShapeで表情の追加
1.[(VRM名).BlendShape.asset] -> [BlandShape] -> [Select BlendShapeClip] -> [Add BlendShape Clip]をクリック
2.好きな名前にして保存

3.表示名等設定
・[Blend Shape Name] : 任意の表情名
・[Preset] : Unknown
4.[Material List]を選択し、[+]ボタンを押す
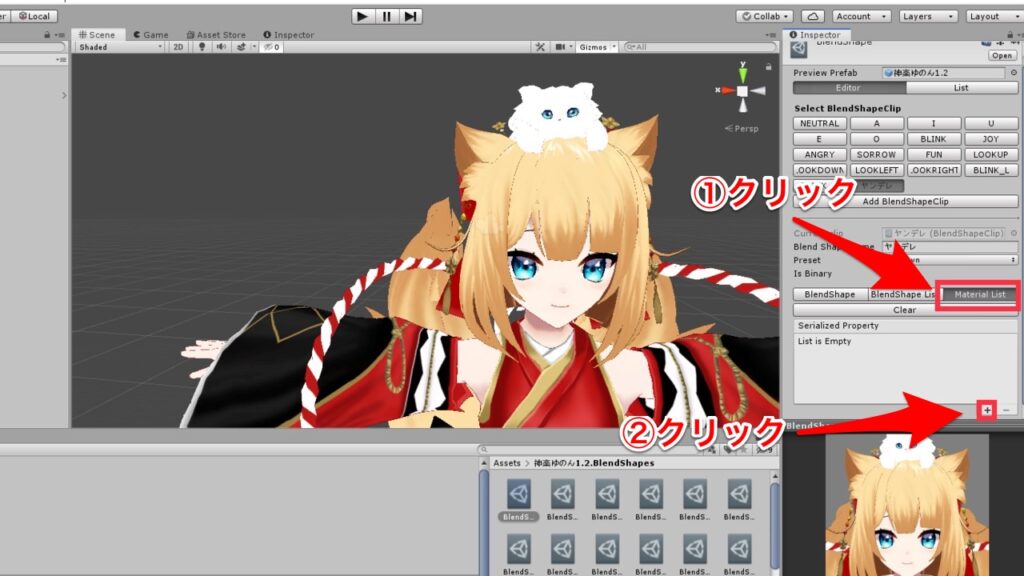
5.プルダウンメニューで、先ほど追加したMaterialを選択
6.[_MainTex_ST]を選択

7.[Tiling]と[Offet]の値を編集
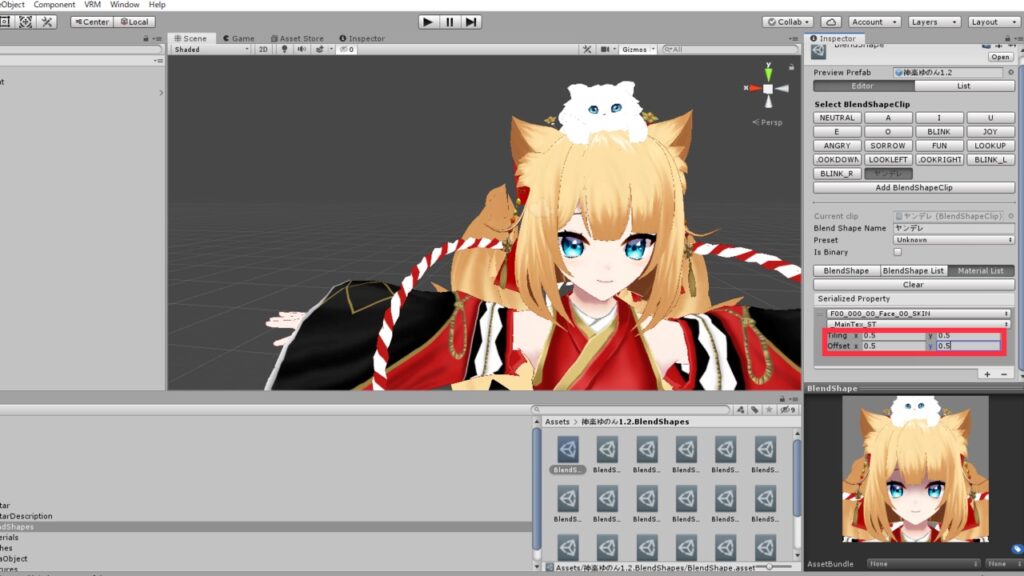
ヤンデレの影が出ました。
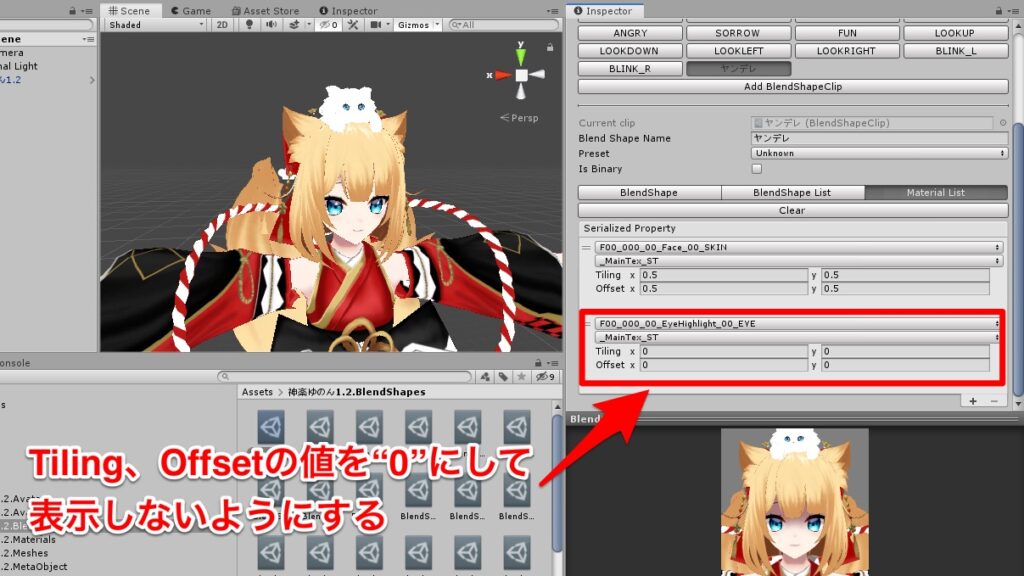
更に修正を重ねます。(瞳のハイライトを消したい)
8.先ほどと同じように[Material List]を選択し、[+]ボタンを押す
9.瞳のハイライトのマテリアルを選択
(VRoidファイルだと[F00_000_00_EyeHighlight_00]のような名前)
10.[Tiling]の値を『0』にする
—完成—
バーチャルキャストで新しい表情を使う設定
バーチャルキャストの表情変化は
『哀:SORROW』『怒:ANGRY』『楽:FUN』『喜:JOY』
の4種類の設定しかありません。
(スタジオ基本操作より)
新しく追加した表情をバーチャルキャスト内で使いたいときは、
上記4つのパラメーターに上書きして使用する必要があります。
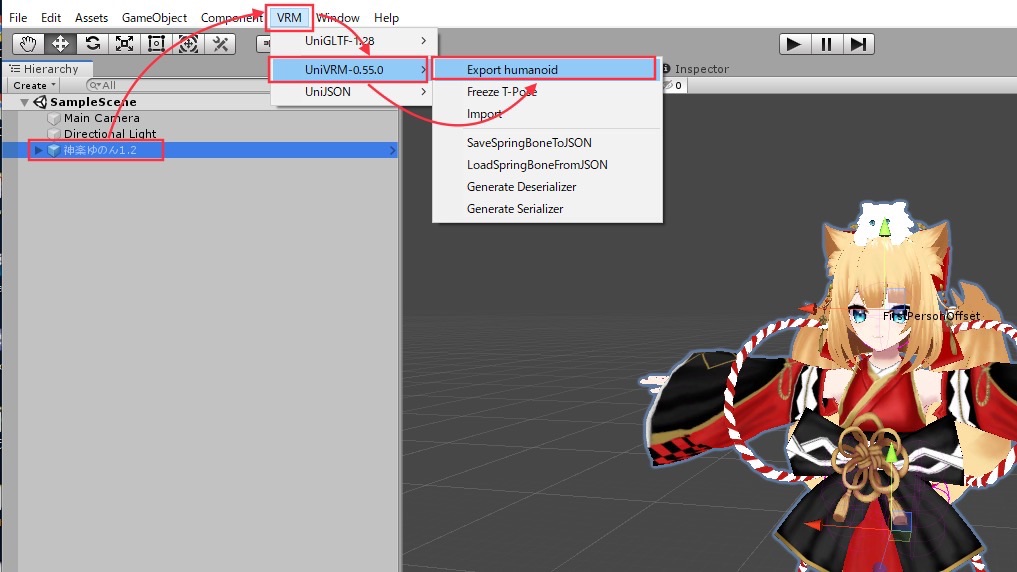
ファイルの書き出し
1.[scene]内のモデルを選択
2.[VRM] -> [UniVRM-x.xx.x] -> [Exporthumanoid]
3.export情報を入力
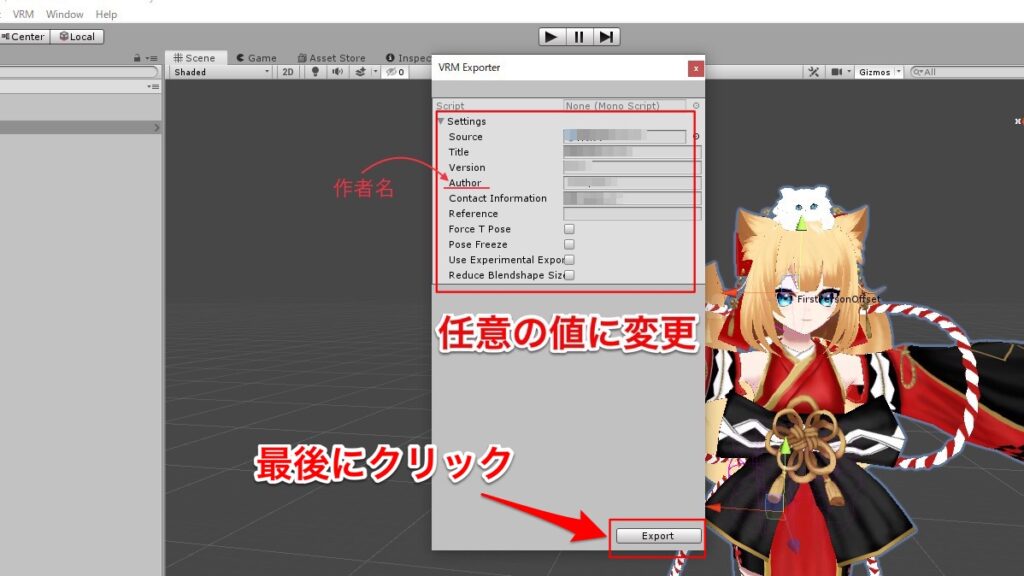
—完成—
以上がVRMファイルに表情を追加や編集するあれこれの方法でした。
★★★★★★★★★★★★★★★★★★★★★
参考までに…
下のツイートの動画が今回まとめたことを
使って作成した動画になります。
おはにゃおー🐱💫
大好きなみんなへ🖤
ハッピーバレンタイン🍫 pic.twitter.com/xYi348fWN7— 神楽ゆのん🍪猫又🐱個人勢Vtuber🍪💫 (@kagura_yunon) February 13, 2020
★★★★★★★★★★★★★★★★★★★★★
最後までご覧いただきありがとうございました♪
神楽ゆのんは現在VTuberとして活動しております!!
Twitterフォロー・チャンネル登録よろしくお願いします🍪💕
★Twitter(@kagura_yunon)
★YouTube(神楽ゆのん-Kagura Yunon-)